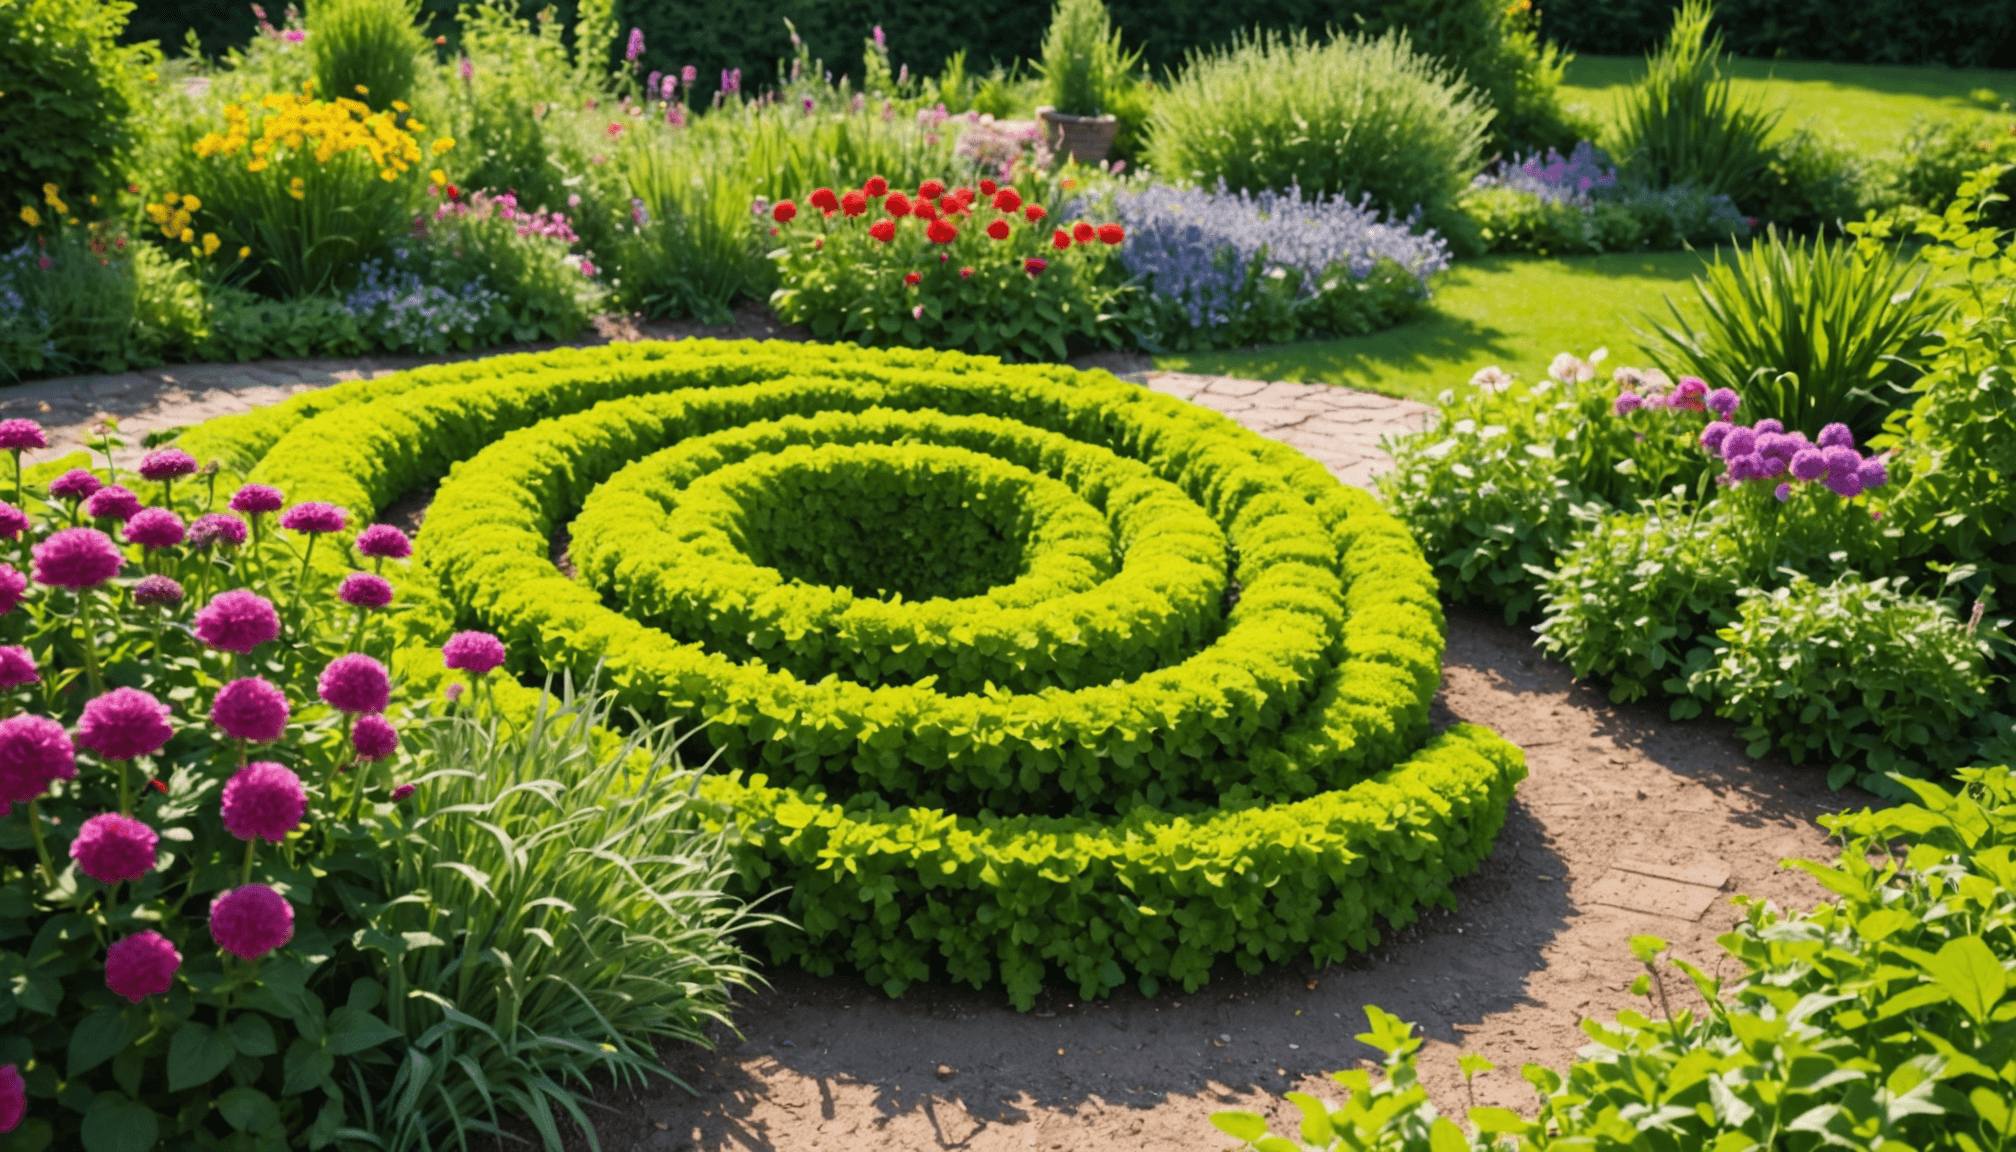
When it comes to designing your herb spiral, envision a space that not only serves as a functional garden but also as a visual delight. The spiral shape optimizes space and creates different microclimates, which is ideal for growing a variety of herbs. Start by choosing a suitable location—preferably a spot that gets at least six hours of sunlight a day. This will ensure your herbs thrive and flourish.
Begin by drawing a rough sketch of your herb spiral on paper. The spiral will start narrow at the bottom and gradually widen as it rises, allowing for various heights and soil conditions. A common dimension for a spiral is around 6-8 feet in diameter, tapering to about 2-3 feet high at the peak. This height is perfect for accessing your herbs easily and allows water to run down to the lower level, ensuring that all plants receive adequate moisture.
Next, consider the materials for constructing your spiral. Natural stones, bricks, or even recycled materials like wooden pallets can be excellent choices. If you opt for stones, make sure they vary in size to create a more rustic look while allowing for better drainage.
- Stone: Provides durability and a natural aesthetic.
- Bricks: Easy to stack and customize for various heights.
- Wood: Cost-effective if you’re on a budget, but ensure it’s treated for outdoor durability.
While constructing the spiral, ensure there are gaps to allow for airflow and drainage. Place larger stones at the bottom and gradually use smaller stones as you work your way up. This not only creates a beautiful visual gradient but also optimizes water retention and drainage as evaporation occurs more easily from the top section.
To make the most of your herb spiral’s design, incorporate different zones. The lower areas can retain more moisture, making them perfect for herbs like chives and mint, which enjoy consistent watering. The middle sections can house more drought-tolerant herbs such as oregano and thyme, and the top section, receiving the most sun and heat, can be ideal for rosemary and sage.
Don’t forget to consider pathways around your herb spiral. Adding accessible paths ensures you can easily reach your herbs for harvesting. Use flat stones or wood chips to create walkways that complement your herb spiral’s natural look, while also making it sturdy enough to support your gardening activities.
Let your creativity shine through! Personalize your herb spiral with decorative features like small garden ornaments, edible flowers, or even companion plants like marigolds that repel pests. The design isn’t just about functionality; it’s also an opportunity for self-expression in your urban homesteading venture.
Selecting Suitable Herbs
When selecting herbs for your spiral garden, it’s important to consider both the growing conditions and your culinary preferences. Herbs can be categorized into various types depending on their water requirement, sunlight needs, and growth habits. A successful herb spiral will encompass a mix of these herbs, ensuring you have a diverse selection for cooking, medicinal uses, or even for attracting beneficial insects.
Firstly, consider the herbs that thrive in varying levels of moisture and sunlight. The lower, moist areas of your spiral will be better suited for herbs that appreciate consistent watering, while the upper, drier sections will favor those that need less moisture. Here’s a comparison table to help you understand which herbs are suitable for each section:
| Herb | Water Requirement | Sunlight Needs | Best Location in Spiral |
|---|---|---|---|
| Chives | Moderate | Full sun | Lower section |
| Mint | High | Full sun to partial shade | Lower section |
| Oregano | Low | Full sun | Middle section |
| Thyme | Low | Full sun | Middle section |
| Rosemary | Low | Full sun | Top section |
| Sage | Low | Full sun | Top section |
These selections can be expanded further based on your personal taste and cooking styles. For instance, if you often use herbs like basil or parsley, they can also be included, though they will require more consistent moisture and might be better placed in a shadier spot or a cooler area of the spiral.
In addition to the practical aspects of herb selection, it’s beneficial to plant herbs that can complement one another. Certain herbs, when planted together, can enhance their flavors and also help deter pests naturally. For example, planting basil alongside tomatoes (if you’re incorporating vegetables) can improve their growth while also producing a delicious pairing for your dishes.
Furthermore, consider the growth habits of each plant. Some herbs, like mint, can spread aggressively and may need to be contained in a pot or within the spiral structure to prevent them from overtaking other plants. Others, such as rosemary and thyme, are more contained in their growth and can be spaced more closely without overcrowding.
As you select your herbs, think about their culinary uses and how frequently you will harvest and use them. It’s helpful to have a balance of herbs that will do well throughout the seasons, so you’re not left with a garden that’s either overly abundant or bare at any given time. By carefully selecting herbs based on their characteristics and your personal preferences, you can create a flourishing herb spiral that serves your needs beautifully.
Choosing the Right Location

Choosing the perfect location for your herb spiral is crucial for its success and productivity. As mentioned earlier, a sunny spot receives at least six hours of sunlight each day, but there are additional factors to consider that can amplify your gardening experience.
First, assess the surrounding environment of your chosen area. Look for potential obstructions, such as tall buildings, fences, or trees that could cast shadows throughout the day. Monitor the sunlight patterns over a few days to ensure your herbs get adequate exposure, especially during early morning hours when the sun is rising. This will make a difference in growth, as many herbs thrive on that pleasant morning warmth.
Next, consider the drainage of your chosen location. Herbs dislike “wet feet,” which can lead to root rot. If your selected spot tends to hold water or puddle after rain, you may need to amend the soil or select a different position. If necessary, try building your spiral slightly raised or choose to plant on a slight hill to promote better drainage.
Another aspect to factor in is accessibility. Your herb spiral should be easy to reach for daily maintenance and harvesting. A location close to your kitchen or patio can inspire you to use your fresh herbs more often. Imagine stepping outside with ease to snip some chives for your morning omelet or grabbing basil for a last-minute pasta dish! An easily accessible herb garden will encourage you to incorporate fresh ingredients into your meals, keeping your culinary experience rich and rewarding.
Also, think about wind exposure. Strong winds can damage delicate herb foliage and uproot young plants. A location that is shielded from harsh winds—perhaps near a fence or natural barrier—can help protect your herbs and foster a healthier growing environment.
Lastly, if you have pets or small children, consider their safety and interaction with your herbs. Choose a location that enjoys some distance from play areas but remains welcoming for easy supervision. Adding a small garden border can act as a natural barrier to keep curious paws and hands at bay.
Once you’ve surveyed your options and found an ideal location, mark it out with stakes or garden string to visualize and confirm the size of your spiral. Take a moment to step back and admire how this thriving collection of herbs will blend with your overall outdoor space. It’s these thoughtful considerations that transform a simple herb spiral into a stunning landscape feature while ensuring your culinary endeavors become a flavorful adventure!
Building the Structure
With your design in place and location selected, it’s time to focus on the actual construction of your herb spiral. Begin by gathering your materials based on what you chose earlier—stones, bricks, or other forms of sustainable building materials. This foundational step is essential and sets the stage for the health and aesthetics of your herb spiral.
Start by marking out the base of your spiral with a garden hose, string, or stakes to establish a clear outline of the spiral form. This guide will help you visualize the flow of the design as you begin to build. The spiral should start small and gradually expand outward to form a winding shape that climbs upwards.
Begin by laying down larger stones or bricks at the bottom to create a sturdy foundation. It’s recommended to dig a shallow trench for your first layer to ensure they are secure and won’t shift over time. As you work upwards, stack progressively smaller stones, maintaining the spiral’s shape and ensuring a consistent rise toward the center. Aim for a gentle incline, about 18 inches to 24 inches for the height of the spiral, which allows for easy reach and natural water drainage.
As you build, pay attention to gaps between the stones. These openings are vital for drainage and aeration, allowing water to trickle down without pooling. They can also shelter beneficial insects, which can aid in pollinating your herbs and keeping pests at bay. You might also choose to fill in the gaps with gravel or sand to further enhance drainage while creating a layered effect.
Once the structure is complete up to your desired height, it’s time to fill the spiral with soil. Use a good quality, well-draining potting mix enriched with organic matter to give your herbs the nutrients they need to thrive. As you fill each section, slightly mound the soil to create a level surface and ensure it conforms to the shape of the spiral.
At this stage, take a moment to check the angle and height of your spiral again; adjustments can be made while the structure is still fresh. Once you are satisfied, gently pack the soil to eliminate any large air pockets, allowing for a stable growing medium for your herbs.
Consider implementing a few added features as you finalize the build. Incorporate small captures or mini basins around the spiral to collect and channel runoff efficiently during watering. This can assist in maintaining moisture levels in the lower sections. You might also want to install a drip irrigation system or opt for soaker hoses to ensure even watering throughout your spiral.
Finally, personalize your herb spiral by adding a touch of aesthetics. Surround the garden with colorful stones, ornamental border plants, or decorative mulch that fits in with the overall landscaping theme. You can enhance visual appeal while ensuring your herb spiral remains functional and accessible.
“Gardening adds years to your life and life to your years.” – Unknown
With a well-constructed herb spiral completed, you now have a vibrant centerpiece that embodies both form and function. Soon, it will become a thriving ecosystem where your herbs can flourish, providing not just ingredients for your culinary adventures, but also a space of peace and connection to nature.
Planting and Maintenance

Once your herb spiral is constructed and the soil is in place, it’s time for the delightful process of planting and maintaining your herbs. The excitement of placing each herb into its designated space brings you one step closer to enjoying fresh flavors right from your garden. Start by carefully checking your chosen herbs and their compatibility with the sections of your spiral. Make sure to plant according to their specific preferences for moisture and sunlight, so each herb has the best chance of thriving.
As you plant, dig small holes with a trowel or your hands, depending on the size and root structure of each herb. Gently remove the herbs from their pots, taking care not to disturb the roots too much, and place them in the prepared holes. Fill in around each plant with soil, ensuring that they are covered adequately but not buried too deeply, as this can stunt their growth. Water the newly planted herbs lightly to help settle the soil and eliminate air pockets, providing them with a good start in their new home.
Maintaining your herb spiral is crucial for its long-term success. Regular watering is key, especially after planting. Pay attention to the varying moisture needs of the herbs; the lower plants, like chives and mint, may require more frequent watering compared to the drought-resistant herbs higher up the spiral. A drip irrigation system can be a great asset, allowing for consistent moisture without over-saturating certain areas.
Fertilization of your herbs should be done with care. Organic compost can be added seasonally to enrich the soil naturally, providing your herbs with the nutrition they need without harmful chemicals. Additionally, mulching around the base of the plants can help retain moisture, suppress weeds, and even enhance soil quality as it decomposes.
Weed management is another important aspect of herb maintenance. Regularly check for weeds that may compete with your herbs for nutrients and water. Hand-pulling weeds is recommended to avoid disturbing the roots of your herbs. Your herb spiral should also be monitored for pests; by attracting beneficial insects or using companion plants, you can create a balanced ecosystem that supports natural pest control.
As you become familiar with your herb spiral, take note of how different herbs flourish and adapt. Some may thrive in specific conditions better than others, and documenting your experiences can enhance your gardening skills. Embrace the opportunity to experiment with seasonal crop rotations, companion planting, and interplanting as you refine your herb garden into a true culinary sanctuary. Over time, you’ll not only enjoy growing your own herbs but also gain a deeper understanding of the art of gardening.
- How often should I water my herb spiral?
- Watering frequency depends on the specific herbs and environmental conditions, but generally, the lower sections will need more moisture. Check the soil regularly; if it’s dry to the touch, it’s time to water.
- What type of soil is best for herbs in a spiral?
- A well-draining potting mix enriched with organic matter is ideal for herbs. This type of soil provides necessary nutrients while allowing water to flow and prevent root rot.
- Can I mix different herbs in the same section?
- It’s best to group herbs with similar moisture and sunlight needs. Mixing herbs with conflicting requirements can lead to poor growth and competition for resources.
- How do I deal with pests in my herb spiral?
- Attracting beneficial insects or using companion plants can help control pests naturally. You can also use organic insecticidal soaps or neem oil to manage infestations if necessary.
- Should I fertilize my herbs, and if so, how often?
- Yes, fertilization is beneficial. Using organic compost a couple of times a year can provide the nutrients your herbs need without introducing harmful chemicals.
- Is it necessary to prune my herbs?
- Yes, regular pruning helps promote bushier growth and prevents flowering, which can alter the flavor of your herbs. Prune to harvest and maintain healthy plants.
- Can I grow annual herbs in my spiral garden?
- Absolutely! Annual herbs like basil and cilantro can be grown among your perennial herbs. Just remember to replant these each year, as they will not regrow after winter.
Harvesting and Enjoying Your Herbs
Harvesting your herbs not only enhances your culinary creations but also promotes healthy growth by encouraging plants to produce even more foliage. The timing and method of harvest can vary based on the type of herb you’re dealing with, so a little knowledge goes a long way. Here are some straightforward guidelines to ensure you’re getting the most out of every snip!
Start by observing the growth of your herbs. Generally, herbs are best harvested in the morning after the dew has dried but before the heat of the day sets in. This timing helps retain the essential oils that make fresh herbs so aromatic and flavorful.
When it comes to actually harvesting your herbs, consider using clean scissors or garden shears for the job. For herbs like basil and oregano, pinch the top leaves off, which encourages the plant to grow bushier. Avoid removing more than one-third of the plant at once to allow for recovery and continued growth. Here’s a quick reference for harvesting some common herbs:
- Basil: Harvest the top leaves regularly to prevent flowering and extend the growth season. Try to leave at least two sets of leaves on the stem.
- Mint: Cut stems back to about one-third of their height, ideally before it flowers to keep its flavor intense.
- Chives: Use scissors to snip the leaves close to the base as needed, promoting continual growth.
- Thyme and Oregano: Harvest by cutting the stems for a bunch; this approach encourages new growth from the base.
After harvesting, wash your herbs gently under cool water and pat them dry with a clean towel. This will ensure any dirt or pests are removed, allowing you to enjoy your fresh herbs without worry.
Beyond the thrill of fresh utilization, preserving your herbs is also an excellent practice. If you find yourself with a surplus, consider drying or freezing them. To dry herbs, hang small bundles upside down in a dark, dry area with good airflow, or use a dehydrator. For freezing, chop the herbs and place them in ice cube trays with a bit of water or olive oil, creating convenient flavor boosters for future meals.
Incorporating freshly harvested herbs into your dishes can elevate the flavor profile of your meals. Basil in caprese salads, thyme in roasted vegetables, or mint in yogurt dressings can transform simple recipes into outstanding culinary experiences. Don’t shy away from experimenting—try creating herb-infused oils or butters for added gourmet flair!
Remember that the joy of gardening doesn’t stop at harvesting. Regular usage will remind you to keep an eye on your herbs’ needs. Monitor their health, and stay in tune with seasonal changes to ensure your splendid herb spiral continues to be a blessing in your kitchen all year round.
So, roll up your sleeves and enjoy your freshly harvested herbs. Share them with friends and family, or savor them yourself as you become more adept in the culinary delights your herbs can provide!