Self-sufficiency embodies the ideal of minimizing reliance on external systems and maximizing personal productivity within your own home. This concept not only enhances your independence but also fosters a sustainable lifestyle that can significantly lower your environmental footprint. As you embark on your journey toward becoming self-sufficient, consider how DIY projects can play a crucial role in transforming your living space and lifestyle.
To begin understanding self-sufficiency, it’s essential to evaluate your current resources and needs. Ask yourself:
- What are my basic needs—food, water, energy, and shelter?
- Which of these needs can I meet through DIY projects?
- How can I optimize my home environment for self-sufficiency?
One foundational aspect of self-sufficient living is the ability to produce your own food. Home gardening is a rewarding DIY project that allows you to grow fresh produce while learning about sustainable agriculture practices. Start small with herbs and vegetables that thrive in your local climate, and expand as you gain confidence. Research home improvement techniques to create raised beds or vertical gardens, optimizing space even in urban settings.
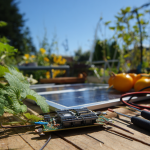
Energy independence is another vital element of self-sufficiency. Consider investing in solar energy solutions. As a DIY enthusiast, you can explore options such as building your own solar panels or installing solar water heaters. There are ample online resources and communities that can guide you in these initiatives, providing step-by-step instructions and troubleshooting tips for various DIY projects.
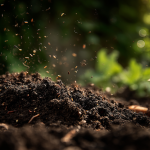
Additionally, understanding and implementing effective waste management techniques will contribute to your self-sufficient lifestyle. Composting organic waste not only reduces landfill contributions but also enriches your garden soil. Begin a simple composting system in your backyard or even in a container for small spaces, and be sure to include materials like kitchen scraps, yard waste, and even cardboard. Resources like the EPA offer comprehensive guidelines on how to get started.
Moreover, nothing speaks self-sufficiency quite like creating your own water supply through rainwater harvesting systems. Installing rain barrels is a feasible DIY project that can drastically reduce your water costs and provide you with a sustainable irrigation source for your garden. Learn about the different types of rainwater collection systems available and choose the one that best fits your home and local regulations.
Incorporating these elements into your home requires a proactive mindset and willingness to learn. By committing to DIY projects focused on self-sufficiency, you can actively shape a home that not only meets your needs but also serves as a sanctuary for sustainable living. Approach each project with curiosity and creativity, and you’ll find great satisfaction in the knowledge that you are taking steps toward a more self-sufficient lifestyle.
Solar energy solutions for DIY enthusiasts

Solar energy solutions have become increasingly accessible for DIY enthusiasts looking to enhance their self-sufficiency. By harnessing the power of the sun, you can significantly reduce your reliance on conventional energy sources and lower your utility bills, making your home more eco-friendly and cost-effective. One of the most enticing aspects of solar energy is that there are various avenues to explore, depending on your technical expertise and financial resources.
For beginners, building a simple solar panel can be an exciting and educational DIY project. The primary components include solar cells, a soldering iron, and basic wiring materials. You can purchase solar cells online or at renewable energy supply stores. A basic setup involves connecting several solar cells in series to achieve the desired voltage and then encasing them in a durable, weather-resistant frame. This project not only empowers you to produce clean energy but also strengthens your understanding of solar technology and its applications.
For those who wish to dive deeper, consider constructing a complete solar power system that integrates battery storage. This allows for energy use during nighttime or cloudy days, effectively creating a more reliable energy supply. Here’s a breakdown of components typically required:
| Component | Function |
|---|---|
| Solar Panels | Convert sunlight into electricity |
| Charge Controller | Regulates voltage and current coming from the solar panels |
| Batteries | Store excess electricity for later use |
| Inverter | Converts stored DC electricity into usable AC electricity for home use |
In addition to solar panels, solar water heaters present another excellent option for DIY enthusiasts aiming to improve home efficiency. These systems utilize solar energy to heat water for domestic use, significantly reducing the energy demand placed on traditional water heaters. Building a solar water heater can be accomplished with simple materials such as copper tubing, a large water storage tank, and insulation. With resources available online, tutorials can guide you through the process, covering everything from constructing the collector to the proper installation placement for maximum sunlight exposure.
A significant advantage of investing time in solar energy solutions is the potential for government incentives and rebates aimed at promoting renewable energy adoption. Before commencing any projects, check with your local regulations and tax incentives that might be available for DIY solar installations. This not only legitimizes your efforts but can also provide financial support, significantly lowering the initial investment cost.
Ultimately, exploring solar energy solutions as part of your home improvement initiatives fosters a proactive approach to sustainability. Engaging in these DIY projects not only enhances your home’s energy independence but also empowers you to take control of your energy production in a way that aligns with your values and contributes to a greener planet. With continuous advancements in technology, the possibilities for utilizing solar energy in your self-sufficient home are ever expanding, making it an exciting era for DIY enthusiasts.
Rainwater harvesting systems
Rainwater harvesting systems are an ingenious way to capitalize on one of nature’s most valuable resources: water. By collecting and storing rainwater, you not only lessen your dependency on municipal water supplies but also promote an eco-friendly approach to water management within your home. Implementing a rainwater harvesting system can seem daunting, but with the right tools and guidance, it’s a manageable DIY project that can yield impressive benefits.
Start by determining the size and scope of your rainwater collection system. Analyze your roof area to estimate how much water you can collect. As a rule of thumb, one inch of rainfall on a 1,000-square-foot roof can yield about 600 gallons of water. This is particularly significant if your area experiences regular rainfall, allowing you to stock up substantially for household use, irrigation, or gardening.
One of the most common methods of collecting rainwater is by using rain barrels. Here’s a step-by-step guide to set up your rain barrel system:
- Choose Your Location: Select a suitable spot close to your downspout to minimize piping needs. Ensure the ground is level and stable.
- Purchase or Build Your Rain Barrel: You can buy ready-made rain barrels or construct your own using a 50-gallon food-grade plastic drum. Make sure the barrel has a tight-fitting lid to keep out debris and mosquitoes.
- Install the Diverter: Connect a rainwater diverter to your downspout. This device directs the rainwater into your barrel while preventing overflow back into the gutter system. Follow manufacturer instructions or look for DIY guides to ensure proper installation.
- Add a Spigot: Consider drilling a hole near the bottom of your barrel to install a spigot, making it easier to access the collected water.
- Maintain Your System: Clean your rain barrel regularly to prevent algae growth and check your gutters for debris before storms to facilitate smooth water flow.
It’s important to note that rainwater harvesting regulations vary by location. Before you proceed, check local laws regarding rainwater collection to ensure compliance. Some areas may have restrictions on plumbing connections or usage of harvested rainwater for potable purposes.
In addition to basic rain barrels, consider expanding your system into a comprehensive rainwater catchment system that includes an underground storage tank for larger water needs. This method may require more intricate plumbing but can significantly increase your water storage capacity for extensive gardens or landscaping projects.
A practical tip for enhancing your rainwater collection is to install a first flush diverter. This device ensures that the initial, most polluted water from a rain event is excluded from your storage tank, keeping your harvested water pure for non-potable uses such as irrigation.
Further, integrating your rainwater harvesting system with a garden can create a symbiotic relationship where the stored water nourishes your plants effectively. To maximize this potential, consider planting drought-resistant native species that thrive on the collected rainwater, thus minimizing the need for additional irrigation during dry spells.
As you dive into rainwater harvesting, remember that this DIY project not only contributes to your self-sufficiency but positively impacts the environment by reducing stormwater runoff and conserving precious water resources. With creativity and dedication, you can craft a rainwater harvesting system that suits your household needs while stepping towards a more sustainable future.
Home gardening for fresh produce
 Home gardening is one of the most fulfilling and practical DIY projects for those looking to enhance their self-sufficiency. The ability to grow your own fresh produce not only provides you with healthy food options but also encourages a connection with nature, reduces your carbon footprint, and can be a cost-saving endeavor. Whether you have a sprawling backyard or a small balcony, there are numerous ways to cultivate your own edible garden.
Begin by selecting the right plants for your space and climate. Consider starting with easy-to-grow options like lettuce, tomatoes, or herbs such as basil and mint. These can provide quick results and are versatile in culinary uses. Research your local growing season and choose varieties that thrive in your area, which will enhance the chances of a bountiful harvest.
Creating raised beds is a popular method for home gardening, particularly for those wanting to optimize their growing space while improving soil quality. You can easily construct raised beds using untreated wood or recycled materials. Ensure they are elevated enough to allow for proper drainage, and fill them with nutrient-rich organic soil, compost, and mulch to create a thriving environment for your plants.
For those with limited space, vertical gardening is an ingenious solution. This technique involves planting upwards rather than outwards, using structures like trellises, shelves, or hanging pots. Climbing plants like cucumbers or peas benefit from this method, maximizing limited floor space while allowing you to enjoy the beauty of your garden.
Watering efficiently is crucial to a successful home garden. Implementing a drip irrigation system can save water while ensuring that plants receive consistent moisture, which is particularly beneficial in hotter months. Alternatively, rainwater collected from your rainwater harvesting system can be directed to hydrate your plants, making your gardening efforts more sustainable and cost-effective.
Incorporating companion planting can also enhance the productivity of your garden. Certain plants, when grown near each other, can deter pests, attract pollinators, and even improve each other’s growth. For example, planting marigolds alongside vegetables can help repel harmful insects, while planting basil near tomatoes can enhance their flavor and growth.
As you engage in these home improvement projects, don’t underestimate the value of community. Many local gardening clubs and online forums offer a wealth of knowledge, from seed swapping to advice on pest management, creating a rich tapestry of resources for both novice and experienced gardeners.
“To plant a garden is to believe in tomorrow.” – Audrey Hepburn
Embracing home gardening means fostering a sense of patience and resilience. It may take time to see the fruits of your labor, but the process of nurturing plants offers invaluable lessons about sustainability and self-sufficiency. By dedicating time and energy to your garden, you create not only a source of nourishment but a sanctuary of growth and vitality in your home.
Composting and waste management techniques
Composting is a transformative process that allows you to turn organic waste into nutrient-rich soil, significantly reducing landfill contributions while enhancing your gardening efforts. By setting up a composting system at home, you embrace the principles of self-sufficiency and sustainability, creating a productive cycle where waste becomes a valuable resource. Start by identifying the materials that can be composted, including fruit and vegetable scraps, coffee grounds, eggshells, yard waste, and even certain paper products.
To establish your composting setup, choose a location that is easily accessible yet out of direct sunlight to prevent overheating. Select a compost bin or build your own from wood pallets, wire mesh, or even a simple plastic container with ventilation holes. Ensure that your compost pile maintains a balanced ratio of carbon-rich “browns” like leaves, twigs, and straw to nitrogen-rich “greens” such as kitchen scraps. This balance is essential for healthy decomposition. Aim for a mix of one part greens to three parts browns, and turn the pile regularly to aerate it and promote decomposition.
Adding worms to your compost—known as vermicomposting—can accelerate the breakdown process and yield richer compost. Red worms thrive on organic waste, consuming it rapidly and producing high-quality castings that act as a powerful organic fertilizer. Consider setting up a separate bin for vermicomposting indoors if space allows, which can be particularly beneficial during winter months when outdoor composting slows down.
Be mindful of what you don’t include in your compost. Avoid meat, dairy, oily foods, and pet waste, as these can attract pests and create odors. Instead, focus on building a diverse compost mixture that covers a wide range of organic materials. Keeping your compost well-aerated will minimize unpleasant smells and maximize decomposition efficiency. A well-maintained compost system can produce rich compost in as little as a few months, depending on environmental factors and material composition.
Using the compost in your garden not only enhances soil quality but also decreases the need for chemical fertilizers, nurturing an organic growing environment. When spreading compost in your garden beds, ensure that it’s well-mixed into the soil to maximize nutrient availability to your plants. This practice rewards you with healthier plants and more substantial yields, truly demonstrating the beauty of DIY projects focused on self-sufficiency.
As you embark on your composting journey, think about the broader implications of waste management. How much waste do you produce, and what steps can you take to reduce it? By transforming how you perceive waste, you can contribute positively to both your garden and the planet. Each composting endeavor is not merely the act of disposal; it’s a commitment to a recycling mindset that can lead to significant environmental benefits.
- What is composting?
- Composting is the natural process of decomposing organic materials, such as food scraps and yard waste, into a nutrient-rich soil amendment known as compost. This process recycles nutrients back into the soil, enhancing plant growth and health.
- What materials can I compost?
- You can compost a variety of organic materials, including fruit and vegetable scraps, coffee grounds, eggshells, grass clippings, leaves, and wood chips. It’s important to avoid meat, dairy, and oily foods to prevent odors and pests.
- How long does it take to make compost?
- The composting process can take anywhere from a few weeks to several months, depending on factors like the materials used, moisture levels, and how frequently the pile is turned for aeration. Maintaining a balance between browns and greens can expedite decomposition.
- Do I need a special bin to compost?
- No, you can compost without a special bin. Many people use DIY compost bins made from pallets, wire, or simply create a pile in their yard. However, using a bin can help keep the compost contained and organized.
- How do I know when my compost is ready?
- Compost is ready when it has a dark, crumbly texture and an earthy smell. The original materials should no longer be recognizable, and it should not produce any unpleasant odors. You can test it by checking for warmth and moisture levels.
- Can I compost in an apartment?
- Yes, you can compost in an apartment using indoor composting methods such as vermicomposting with worms. There are also compact kitchen compost bins that can handle small amounts of kitchen scraps, ideal for urban living.
- What are the benefits of composting?
- Composting reduces waste sent to landfills, lowers methane emissions, enriches soil, and promotes plant growth. It also helps conserve water by improving soil structure, allowing for better moisture retention.
Building sustainable structures and features

Building sustainable structures and features around your home is a powerful avenue for enhancing self-sufficiency and promoting environmental stewardship. By focusing on locally sourced materials, energy-efficient designs, and practical functionality, you can create a living space that not only meets your family’s needs but also minimizes environmental impact. Here are several approaches to consider for your next DIY projects aimed at sustainability.
Start by exploring the option of building with natural or reclaimed materials. Utilizing wood from salvaged furniture, pallets, or reclaimed barns not only adds character to your structures but also significantly reduces the carbon footprint associated with new materials. For instance, consider constructing an outdoor garden shed or composting station using reclaimed wood. This not only provides utility but also helps reduce waste and promotes upcycling—a fundamental aspect of sustainable living.
Incorporating energy-efficient features into your home is another influential way to promote sustainability. Designing structures that maximize natural light can drastically reduce the need for artificial lighting. Large windows, skylights, or strategically placed light tubes allow sunlight to flood indoor spaces, enhancing ambiance while minimizing energy consumption. For those in more temperate climates, consider incorporating overhangs or awnings to provide shade during hot months while allowing sunlight to warm interiors in the winter.
Another critical aspect of your DIY projects can be the installation of green roofs or living walls. These features not only insulate your home effectively but also improve air quality and promote biodiversity by creating habitats for local flora and fauna. Green roofs can be constructed using a layer of vegetation on top of a waterproof membrane, providing an appealing aesthetic and additional gardening space. If building from scratch, ensure your roof structure can support the additional weight, and select native plants that thrive in your local climate.
Permaculture principles can be an excellent framework to guide your home improvement projects as well. Permaculture focuses on creating self-sustaining ecosystems in residential environments, enhancing productivity while minimizing resource inputs. Start by zoning your property according to use; for instance, position your vegetable garden near the kitchen for easy access and the compost pile closer to your garden beds to facilitate nutrient cycling. This thoughtful planning reduces labor while maximizing efficiency, embodying the essence of self-sufficiency.
Integrating renewable energy systems, such as geothermal heating or small wind turbines, can also greatly enhance sustainability. While building a geothermal system may require professional consultation, understanding the basics helps in planning and budgeting for the project. Wind turbines need adequate space and consistent wind patterns to be effective, making them a viable choice for more rural or expansive properties. However, even smaller solar-powered features, like pathway lights or outdoor fountains, can demonstrate a commitment to renewable energy without extensive installations.
Finally, don’t overlook the power of functionality in your sustainable structures. Projects like creating rain gardens can help manage stormwater runoff efficiently while providing beauty and biodiversity. Rain gardens utilize native plants and strategic landscaping to absorb and filter rainwater, thus preventing erosion and replenishing groundwater supplies. Engage with local resources or extension services to identify suitable species that thrive in your region and to ensure proper installation techniques that maximize the garden’s effectiveness.
When pursuing these DIY projects, remember that local codes and regulations may guide or restrict certain innovations. Always research these aspects before starting your build to ensure compliance and safety. Through these creative endeavors, you not only enhance your home but cultivate an environment of sustainability that reflects your commitment to self-sufficiency and environmental responsibility. The journey toward a more sustainable home is rewarding and, through continued education and diligent practice, you can make significant strides toward achieving your goals.