Home canning serves as a vital tool for those pursuing self-sufficiency, offering a way to preserve the bounty of your garden or local produce. By practicing home canning, you not only extend the shelf life of your foods but also gain control over what goes into your meals, reducing reliance on store-bought products laden with preservatives and chemicals.
One of the primary benefits of home canning is the ability to create a diverse pantry tailored to your family’s tastes and nutritional needs. Whether you grow tomatoes, cucumbers, or berries, canning allows you to enjoy them year-round. Imagine the satisfaction of enjoying a jar of homemade tomato sauce in winter, knowing you cultivated the tomatoes yourself!
Moreover, home canning significantly reduces food waste. By canning excess produce before it spoils, you can save money and ensure that nothing goes to waste. This method promotes sustainability and allows you to make the most of your harvest.
Home canning can also foster a sense of community. Consider hosting canning parties where friends or family come together to preserve seasonal produce. This collaborative spirit not only makes the process more enjoyable but also strengthens bonds and shares knowledge. If you’re near a local farmers’ market, partner with your neighbors to buy in bulk, which can also cut costs.
Another overlooked advantage of canning is the development of skills that promote overall self-sufficiency. As you learn the art of food preservation, you become more aware of seasonal produce and the best practices for handling food safely and effectively. This knowledge empowers you to make informed choices about your food sources, fostering a deeper connection with what you consume.
If you’re considering home canning, it’s important to approach it with confidence and creativity. Explore variations in flavors, such as adding herbs or spices to your pickles or experimenting with fruit jams. The possibilities are nearly endless, making it an exciting avenue for culinary creativity.
To start reaping these benefits, gather your supplies and choose recipes that excite you. You’ll soon discover that home canning is more than a method of food preservation; it’s a fulfilling journey toward greater self-sufficiency and a more sustainable lifestyle.
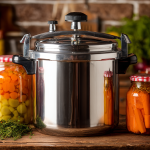
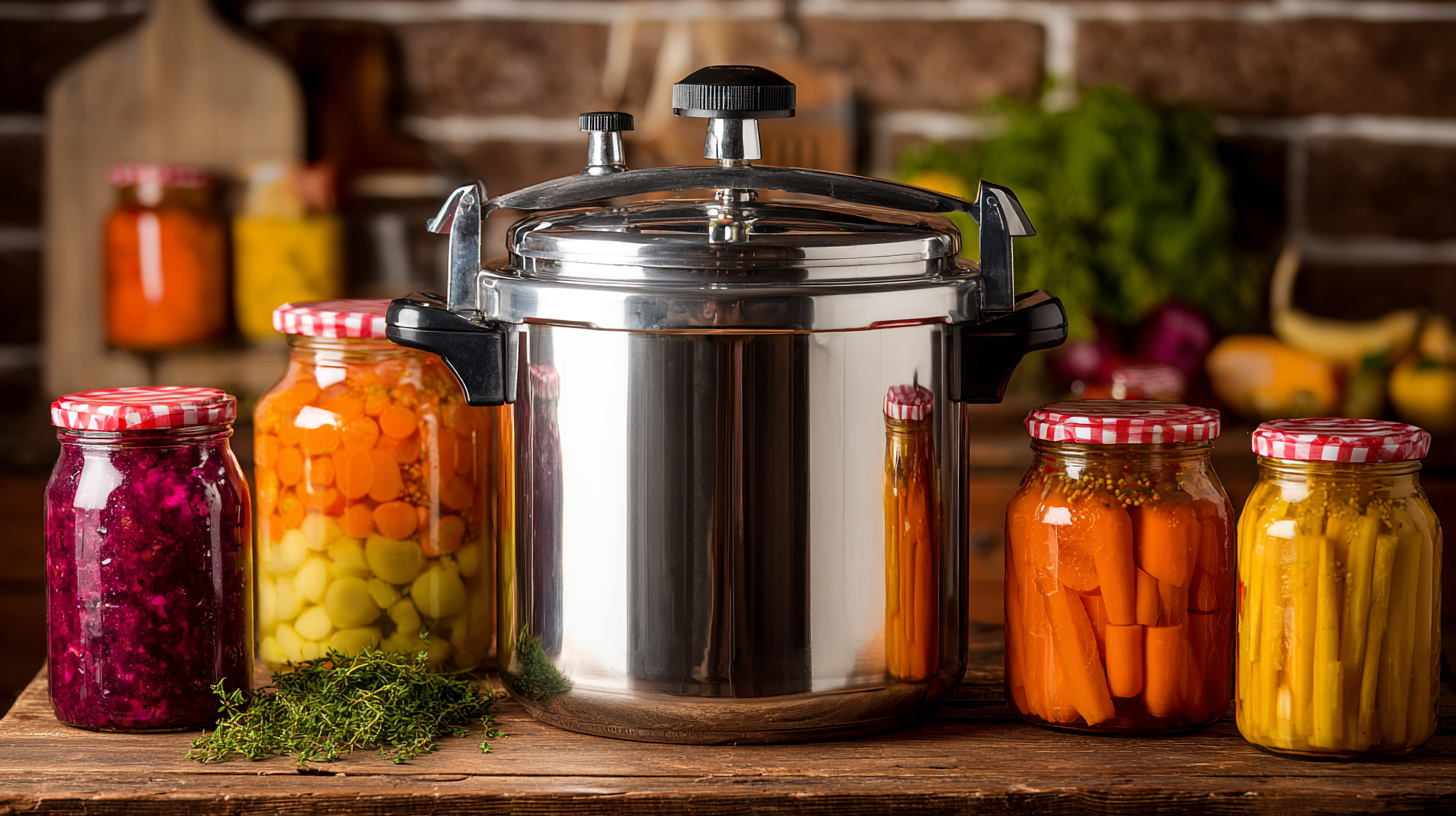
Essential equipment for home canning
 To embark on your home canning journey, having the right equipment is essential. The necessary tools not only ensure the process runs smoothly and efficiently but also contribute to the safety and quality of the preserved foods. Whether you’re a novice or an experienced canner, understanding the fundamental equipment needed can streamline your efforts and enhance the overall experience.
At the heart of home canning is the canner itself. There are two primary types: the pressure canner and the water bath canner. A pressure canner is designed for low-acid foods, such as vegetables, meats, and poultry, where higher temperatures are needed to destroy potentially harmful bacteria. Conversely, a water bath canner is suitable for high-acid foods like fruits, fruit juices, jams, and pickles.
Here is a comparative table that outlines the essential equipment needed for both types of canners:
| Type of Canner | Equipment Needed | Suitable Foods | Key Features |
|---|---|---|---|
| Pressure Canner |
| Vegetables, meats, poultry, stocks | Can handle low-acid foods; operates at high pressure and temperature |
| Water Bath Canner |
| Fruits, fruit juices, jams, jellies, pickles | Ideal for high-acid foods; easy to use and readily available |
In addition to canners, several other tools aid in the preservation process. Canning jars are crucial, as they need to be both durable and sealable. Opt for jars specifically designed for canning to ensure they can withstand high temperatures without breaking. Self-sealing lids are also essential; these lids form an airtight seal that preserves the contents of the jar.
A jar lifter is indispensable, allowing you to safely remove hot jars from boiling water without risking burns. A bubble remover or headspace tool is useful in removing air bubbles trapped in the jar, ensuring that food is properly packed and sealed. Lastly, a funnel can facilitate the transferring of foods into jars without mess.
Proper cleaning and sterilizing of equipment are crucial steps before you begin canning. It’s recommended to sterilize jars by washing them in hot, soapy water and placing them in a boiling water bath for at least 10 minutes. This practice helps eliminate harmful bacteria and prepares your jars for successful food preservation.
Investing in quality canning equipment not only protects your health but enhances your canning experience, making it a more rewarding practice for self-sufficiency. Understanding which tools cater to specific types of foods empowers you to make the best choices and broadens your options in food preservation. With the right equipment and a little practice, you’ll be well on your way to creating a thriving pantry filled with homemade, preserved goodness.
Choosing the right foods for canning
Choosing the right foods for canning is an integral part of the home canning process, directly influencing the quality and flavor of your preserved goods. Different foods bring unique tastes and textures to the table, enhancing the diversity of your pantry while promoting self-sufficiency. Here are some practical guidelines to help you select the best candidates for your canning adventures.
When it comes to canning, you can categorize foods into two groups: high-acid and low-acid. Understanding which foods fit into each category is vital for effective food preservation. High-acid foods, such as fruits, tomatoes, and pickles, can be processed safely using the water bath method, which is simpler and more accessible for beginners. On the other hand, low-acid foods, such as vegetables and meats, require a pressure canner to achieve the necessary temperatures for safe preservation.
Here are some excellent options for home canning:
- Fruits: Berries, peaches, and apples are fantastic choices for canning. They are naturally high in acid, making them perfect for jams and preserves, which can be used to sweeten breakfast dishes or as toppings for desserts.
- Tomatoes: Fresh garden tomatoes can be canned easily. Consider making spaghetti sauce or diced tomatoes to enjoy the true taste of summer all year round.
- Vegetables: Green beans, corn, and carrots are great low-acid options. When canning vegetables, it’s essential to use a pressure canner to ensure safety.
- Pickles: Cucumbers pickled with vinegar and spices create delicious tangy snacks. Experiment with various pickling spices to create a signature flavor unique to your kitchen.
- Soups and stocks: Consider canning homemade vegetable broth or soups, which serve as a convenient base for a multitude of meals.
When selecting produce for canning, freshness is key. Opt for fruits and vegetables that are at their peak ripeness. Not only do they pack more flavor, but they also have a higher nutrient content, ensuring that your canned goods are as healthy as they are delicious. Local farmer’s markets often provide the freshest options, and participating in community-supported agriculture (CSA) can yield seasonal abundance to can.
Tip: Always wash your produce thoroughly to remove any pesticides or soil before processing. It’s also beneficial to remove any blemishes or spoiled parts, as these can affect the quality of your final product.
Another consideration is the consistency and texture of the food you wish to can. Some foods may break down more than others during the canning process, producing different results. For example, overripe fruits may turn mushy when canned, while firmer varieties will retain their structure. Testing a small batch can help you determine what works best for your tastes.
Finally, keep in mind the expiration timelines for different foods. Some items, like jams and jellies, last longer than others. Understanding which foods have a shorter shelf life will help you rotate your supplies more efficiently and reduce waste.
Incorporating a variety of foods into your canning practice not only enhances your culinary repertoire but also empowers you to embrace self-sufficiency. By making thoughtful selections and experimenting with different recipes, you can create a vibrant, homemade pantry brimming with flavors that reflect your unique taste. Remember, the journey of home canning is all about exploration and enjoyment, so take the time to discover your favorites!
Safety guidelines for successful canning
 Before you begin your home canning journey, adhering to safety guidelines is paramount to ensure the success and quality of your preserved goods. Understanding the proper techniques not only guarantees delicious results but also prevents the risk of foodborne illnesses associated with improper canning methods.
First and foremost, it’s essential to follow tested recipes from reliable sources. Recipes that have been specifically developed for canning have undergone rigorous testing to ensure safety. Using untested methods or altering ingredients and proportions can jeopardize the acidity levels essential for preserving food safely.
“Food preservation, when done correctly, can enhance the safety and longevity of your food supply, embodying the essence of self-sufficiency.”
Acidity plays a crucial role in home canning. High-acid foods, like fruits and tomatoes, can generally be processed with a water bath canner. However, low-acid foods require precise temperatures achieved through pressure canning to prevent harmful bacteria, such as botulism, from thriving. It’s vital to respect these distinctions and select the appropriate canning method based on the food type.
Before you start the canning process, ensure that all your equipment is clean and sterilized. Jars should be washed in hot, soapy water and can be sterilized by boiling them for 10 minutes. Lids should be brand new to ensure proper sealing. Additionally, inspect your jars for any nicks or cracks, as damaged jars may not seal correctly and could lead to spoilage.
Maintaining the right environment during the canning process is also important. Work in a clean area free from pests and contaminants, and ensure that the heat source is adequate for your canner type. If using a pressure canner, familiarize yourself with all its components and pressure indicators, ensuring you can operate it safely.
Once you fill your jars, leave the appropriate headspace as specified in your recipe. This space is critical for creating the vacuum seal during processing. After sealing, the jars should be processed for the recommended time in a boiling water bath or pressure canner to ensure that they are safe for long-term storage.
Cooling is the next step after processing. Allow the jars to cool undisturbed for at least 12 hours before checking the seals. A properly sealed jar will have a slight indentation in the center of the lid that does not move when touched. If you find any jars that have not sealed correctly, refrigerate them and consume the contents within a few days.
Finally, label and store your home-canned goods in a cool, dark place. Keeping them in a consistent environment helps maintain their quality over time. Always check for signs of spoilage before consuming, such as bulging lids or unusual odors.
By prioritizing safety and adhering to tested guidelines, you can enjoy the many benefits of home canning while ensuring your preservation efforts contribute to your self-sufficiency. With diligence and attention to detail, home canning can become a satisfying aspect of your sustainable lifestyle.
Creative recipes for home-canned goods
Creative recipes can elevate your home canning experience from mere necessity to true culinary artistry. Experimenting with diverse flavors and unique combinations provides an avenue for showcasing your personality in the kitchen while ensuring that you have a rich array of preserved goods to enjoy year-round. For instance, consider crafting spiced apple butter, where the natural sweetness of apples meets the warmth of cinnamon and nutmeg, resulting in a delightful spread perfect for toast or as an ingredient in baked goods.
Another fantastic recipe to try is pickled carrots infused with ginger and garlic. This tangy mix not only serves as a crunchy snack but also makes for a vibrant addition to salads or sandwiches. Moreover, leveraging seasonal produce allows for exciting varieties, such as strawberry habanero jam, which marries the sweetness of summer strawberries with a kick of heat for a truly unique flavor experience. Think about creating a savory salsa that combines seasonal tomatoes, peppers, and herbs for a delicious topping for grilled meats or as a dip for chips.
For those who wish to store summer’s bounty, a vegetable medley, comprised of zucchini, bell peppers, and yellow squash, can be canned in a simple brine to provide a colorful side dish ready for any meal. Additionally, canning stocks and broths can prove invaluable in your kitchen. A rich chicken broth or a vegetable stock can be a foundational ingredient for countless recipes, elevating soups and stews into something extraordinary.
Don’t hesitate to personalize these recipes by adding your favorite spices or experimenting with new ingredients. As you delve into this rewarding process, savor the journey of discovering what flavors resonate with you and your family. The process of home canning goes beyond storage; it is about crafting mouthwatering culinary delights that reflect your creativity and passion for self-sufficiency.
- What types of foods can I can at home?
- You can can a variety of foods, including fruits, vegetables, meats, and jams. High-acid foods like tomatoes and fruits can be processed with a water bath canner, while low-acid foods require a pressure canner for safe preservation.
- How long do home-canned foods last?
- Properly canned foods can last for one to three years when stored in a cool, dark place. Always check for signs of spoilage before consuming, regardless of the expiration timeline.
- Do I need special equipment for canning?
- Yes, essential equipment includes canners (pressure or water bath), canning jars, lids, and tools like a jar lifter and bubble remover. Having the right tools ensures both safety and effectiveness during the canning process.
- Can I modify recipes when canning?
- Modifications to recipes can compromise safety, especially in terms of acidity levels necessary for safe preservation. Always use tested recipes and follow instructions for the best results.
- How can I prevent jars from breaking during canning?
- To prevent jars from breaking, ensure they are designed for canning and avoid sudden temperature changes. Always preheat jars in a dishwasher or warm oven before filling them with hot food.
- What should I do if a jar doesn’t seal properly?
- If a jar doesn’t seal, refrigerate it and consume the contents within a few days. You can try reprocessing the jar with a new lid if desired, following proper canning procedures.
- Is it safe to can at high altitudes?
- Yes, but adjustments may be needed for processing times due to lower boiling points at higher altitudes. Consult reliable resources for altitude-specific canning guidelines to ensure food safety.
Storage tips for long-lasting supplies

Storing your home-canned goods properly is crucial to ensuring they remain safe and delicious for as long as possible. An organized storage system will not only help keep your pantry looking tidy but also make it easy to locate items when you need them. Here are some practical tips to enhance the longevity of your preserved supplies.
First, always store your jars in a cool, dark, and dry place. Ideal storage conditions help maintain the quality and flavor of your home-canned goods. A temperature range of 50°F to 70°F is optimal. Avoid places that experience temperature fluctuations, such as garages or attics that may get too hot in summer or too cold in winter.
When organizing your jars, consider using shelves that can support the weight of the jars without bending or breaking. Stacking jars can be tempting to save space, but doing so increases the risk of breakage. Instead, line them up and label them clearly with the content and canning date. This labeling practice not only helps you keep track of your supplies but also ensures that you use the oldest jars first, a principle known as “first in, first out” (FIFO).
Here are some additional tips to remember when storing your home-canned goods:
- Check seals regularly: Even after proper canning, it’s crucial to visually inspect your jars periodically. Look for bulging lids or leaks, which are indicators of spoilage. If you find any suspicious jars, it’s best to discard them to avoid any health risks.
- Avoid exposure to light: Direct sunlight can degrade the quality of your canned goods over time. Use opaque boxes or cloth covers to protect your jars from light exposure if necessary.
- Rotate stock: As mentioned, keep track of your jars’ expiration dates. Always place newer jars behind older ones to ensure you’re using them in the right order.
- Avoid unwanted odors: Store your jars away from strong-smelling substances, as canned foods can absorb odors from their surroundings.
It’s also worth mentioning that while acidic foods typically have a longer shelf life, they can still lose flavor over time. For best results, consume your home-canned goods within one to two years for optimal taste and quality. Additionally, when storing homemade items like jams or pickles, try pairing them with complementary foods that may enhance your meals during their use.
If you have limited storage options, consider using pantry organizers or even creating a designated storage area in your home specifically for canned goods. This not only keeps your preserves safe but also acts as a reminder of your successful canning efforts!
Leveraging these storage tips will help you prolong the life of your home-canned goods, ensuring that you can enjoy your self-sufficiency journey for many seasons to come. With careful attention to how you store and maintain your preserved foods, you’ll create a reliable food supply that reflects the hard work and love you put into your home canning adventures.