When it comes to plant propagation, understanding the different methods available is key to successfully expanding your green haven. Each technique has its own set of benefits and can cater to various plant types, ensuring that even novice gardeners can thrive. Here are some popular methods to consider:
- Seed Propagation: This is the most common method, involving planting seeds from a parent plant. It’s essential to select high-quality seeds, as this significantly impacts germination rates. You can start seeds indoors in seed trays or directly sow them in your outdoor garden once the conditions are ideal.
- Cuttings: This method involves taking a piece of the parent plant, typically a stem or leaf, and encouraging it to grow roots. Keeping the cuttings moist and in a warm environment can enhance success rates. For many plants, a rooting hormone can expedite the process, making it a popular choice among nursery techniques.
- Layering: Here, you bend a stem of a plant down to the soil while it’s still attached to the parent. Cover part of it with soil and leave the tip exposed. Over time, roots will form at the buried section. This method works well for plants that may not root easily from cuttings.
- Division: Ideal for clump-forming plants, this technique involves separating a mature plant into smaller sections, each with its own roots. It’s a great idea to propagate perennials, and it also prevents overcrowding in your garden.
- Becoming Familiar with Grafting: While slightly more advanced, grafting involves combining parts from two different plants to create one. It’s particularly useful for propagating fruit trees, allowing you to enjoy the characteristics of two different varieties in one plant.
Each of these methods requires a bit of knowledge about the specific plants you’re working with, so be sure to do your research! Pay special attention to the environmental conditions and aftercare needed for your propagated plants. This will ultimately enhance your gardening adventure and help cultivate a flourishing nursery.
Preparing Your Materials
To ensure success in your propagation efforts, gathering and preparing the right materials is crucial. This step sets the foundation for favorable growing conditions and enhances the overall efficacy of your nursery techniques. Here’s a comprehensive guide.
Start with high-quality containers. Pots or seed trays should have adequate drainage holes to prevent water accumulation, which can lead to root rot. For those propagating a large number of plants, consider using biodegradable pots made from materials such as peat or coconut coir. These pots can be planted directly into the soil when the time comes, minimizing transplant shock.
Next, select a suitable growing medium. A proper mix should offer good drainage, moisture retention, and essential nutrients. Here are a few common types of growing mediums to consider:
| Growing Medium | Characteristics | Best For |
|---|---|---|
| Seed Starting Mix | Lightweight, sterile, with good drainage | Seeds and cuttings |
| Pottin Mix | Contains peat, perlite, and fertilizers for rapid growth | Established plants |
| Coconut Coir | Organic, sustainable, retains moisture well | Cuttings and seedlings |
| Perlite | Increases drainage and aeration in the soil | Mix with other mediums for better root development |
In addition to containers and the growing medium, you will also need tools designed for propagation. A sharp, clean knife or scissors is essential for taking cuttings. Ensure that your tools are sterilized before use to prevent transferring pathogens, which can be detrimental to young plants.
Don’t forget about humidity domes or plastic bags, especially when working with cuttings. These create a mini greenhouse environment that retains moisture, helping to boost rooting success. Always ensure that there’s some ventilation to avoid mold.
Finally, gather any additional materials you may need, such as rooting hormones, labels for marking your plants, and a spray bottle for misting your cuttings to maintain humidity levels. By getting everything ready beforehand, you streamline the propagation process and set yourself up for successful plant propagation.
With your materials collected and properly prepared, you will be well on your way to executing effective nursery techniques that will help your propagated plants flourish from the very start.
The Propagation Process

Once you have everything prepared, it’s time to dive into the exciting world of plant propagation! Each method you choose may slightly alter your approach, but understanding the fundamental steps can help you navigate the process with confidence. Here’s a step-by-step guide to ensure your nursery techniques yield impressive results.
Firstly, for cuttings, use your sterile knife or scissors to carefully take a section from the parent plant. For most softwood plants, aim to take a 4-6 inch cutting just below a node—this is where roots are more likely to develop. For hardwood plants, cuttings can be a bit longer. Remember, the healthier the parent plant, the higher the success rate of your propagation efforts!
Once you’ve taken your cuttings, dip the cut end into rooting hormone to stimulate root growth. While rooting hormone isn’t always necessary, it can significantly enhance rooting success, especially for stubborn plants. Pro Tip: Some plants, like succulents, may root better without hormone, so always check specific plant needs.
After applying hormone, plant the cutting into your prepared growing medium. Make a small hole in the medium with a pencil or your finger, place the cutting in, and gently pack the medium around it to provide support. Ensure the cutting is standing straight, as this will help prevent any stress on the new roots.
Now it’s time to create the perfect environment for your new plants! If you’re using humidity domes, cover your cuttings and place them in a location that receives bright, indirect light. If you don’t have a dome, you can make a mini-greenhouse effect using a plastic bag; just be sure to leave some openings for ventilation to prevent mold growth. Keep the soil moist but not soggy, as overwatering can lead to root rot.
For seed propagation, begin by filling your seed trays with the appropriate seed starting mix. Press the seeds into the soil slightly but don’t bury them too deep; most seeds need light to germinate. After sowing, gently water the tray and cover it with a clear plastic lid or plastic wrap to maintain humidity.
Don’t forget to label your trays! This will save you endless confusion down the line. Use waterproof markers to jot down the plant variety and the date of planting. Keeping track of your seed germination dates is crucial; some seeds sprout in a couple of days, while others may take weeks!
Monitor your trays for moisture and light. Once your seedlings emerge, remove the cover gradually to acclimate them to the ambient air. Thin out any overcrowded seedlings once they have two sets of true leaves, allowing the strongest ones to thrive.
As your cuttings or seedlings grow, you may need to provide support in the form of stakes or trellises, particularly for climbing plants. Regularly check for pests and diseases, addressing any issues promptly to maintain the health of your new plants. Consider introducing beneficial insects, such as ladybugs, to help manage pest populations naturally.
Ultimately, patience is key during the propagation process. Some plants may take longer than others to root or produce seedlings, so don’t get discouraged! By paying attention to their needs and adjusting your care accordingly, you’ll significantly enhance your chances of success in your nursery.
Caring for Propagated Plants
To ensure success after propagating your plants, it is essential to provide the right care during their early development stages. Newly propagated plants are particularly vulnerable, making it imperative to create an optimal environment that supports healthy growth.
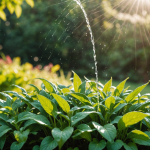
One of the first steps is to maintain adequate moisture levels in the soil. For cuttings, keep the growing medium consistently moist but never waterlogged. This balance is crucial, as excessive water can lead to root rot, while too little moisture can hinder root establishment. Regularly check the top surface of the medium; if it feels dry to the touch, it’s time for a gentle watering. Misting the cuttings can also help to maintain humidity levels, especially if you aren’t using a humidity dome or plastic cover.
Light is another critical factor. Propagated plants require bright, indirect light to thrive. Direct sunlight can be harsh and may scorch vulnerable leaves, while inadequate light can slow growth. Position your plants near a bright window or use grow lights to supplement natural light, ensuring that they receive at least 12-16 hours of light each day for optimal development.
As your propagated plants begin to grow roots and leaves, start acclimating them to their eventual outdoor environment, a process known as “hardening off.” Gradually introduce them to outdoor conditions by placing them outside for a few hours each day, slowly increasing exposure over a week or two. This helps the new plants adjust to fluctuations in temperature and humidity, minimizing transplant shock when they are eventually placed in their permanent spots.
Nutrition is also essential for thriving propagated plants. For cuttings and seedlings, avoid introducing fertilizers immediately; wait until they have established a robust root system. Once they begin to grow, you may apply a diluted liquid fertilizer every few weeks to provide necessary nutrients. For seeds, a high-quality seed starting mix typically contains enough nutrients for initial growth, but once seedlings develop their second set of true leaves, consider transitioning them to a more nutrient-rich potting mix.
Monitor your plants for any signs of stress or disease as they grow. Common issues include wilting, yellowing leaves, or stunted growth, which can indicate problems such as overwatering, pests, or nutrient deficiencies. Address these concerns promptly by adjusting watering schedules, checking for pest infestations, and ensuring that your plants are receiving appropriate light and nutrients. Being proactive allows you to sustain the health and vitality of your nursery.
Moreover, if you’re propagating in a group setting or a larger nursery environment, consider implementing a rotation system to manage younger and older plants effectively. This enables you to provide tailored care for different plant ages and types, ensuring each receives the attention it needs at the right stage in its development.
“Successful gardening is about nurturing growth and learning to observe and respond to how plants communicate with us.”
As your cuttings and seedlings flourish, they will not only beautify your space but also serve as the heart of your expanding nursery, culminating in a rewarding gardening journey where patience and care lead to thriving green companions.
Common Challenges and Solutions
 Facing challenges in plant propagation is a common occurrence, but understanding potential pitfalls can significantly increase your chances of successful outcomes. One of the most prevalent issues is maintaining proper moisture levels in the soil. Overwatering is a frequent mistake that can cause root rot, while underwatering can hinder root development. To achieve a balance, it’s vital to monitor moisture closely; the substrate should be moist but not soggy. Utilizing the right type of growing medium can help regulate moisture more effectively, so be discerning when selecting your mix.
Another challenge arises from inadequate light conditions. Propagated plants, especially delicate cuttings, require bright, indirect light to encourage healthy growth. Situating them in a well-lit area or investing in grow lights can mitigate issues related to low light, which may lead to leggy, weak plants. Conversely, be cautious of direct sunlight, which can scorch new growth. Observing your plants and adjusting their light exposure based on their specific needs is a critical part of successful nursery techniques.
Pest management is yet another hurdle faced during the propagation process. Newly emerged plants are especially vulnerable to pests such as aphids and spider mites. Regularly inspecting your propagated plants and establishing strong, preventative measures can help combat infestations. Employing natural deterrents like neem oil or introducing beneficial insects can be effective ways to keep pests at bay, promoting a healthy environment conducive to growth and development.
To further enhance your nursery’s productivity, consider the role of stabilization. Strong winds or insufficient rooting can easily displace young plants and undermine their chances of survival. Strategically placing stakes or other supports can make a significant difference; this extra support can allow your plants to focus on root growth without the stress of structural instability.
Moreover, transitioning from propagation to nurturing established seedlings requires a mindful approach. Harden off your plants gradually by exposing them to outdoor conditions, helping them acclimate and reducing the risk of transplant shock. This process is paramount to ensuring that your new plants thrive once they are moved to their permanent homes in your garden.
As you work through these challenges, remember that each obstacle presents an opportunity to deepen your knowledge and refine your gardening techniques. Embrace the journey of learning and discovery. The more you engage with the needs of your plants, the more adept you will become at overcoming difficulties and achieving vibrant, flourishing growth.
- What is plant propagation?
- Plant propagation is the process by which new plants are created from existing ones through methods such as seeds, cuttings, or divisions. It’s a fundamental technique for expanding a garden or nursery while ensuring the preservation of specific plant varieties.
- How do I know which propagation method to use?
- The choice of propagation method depends on the plant type and its growth characteristics. Research the specific needs of your plants, as some thrive better with cuttings, while others may be more suited for seed propagation or division.
- How can I prevent mold when propagating plants?
- Mold can be prevented by maintaining good air circulation around your propagated plants and avoiding overwatering. Using humidity domes with ventilation holes or plastic covers that allow some airflow can also help control moisture levels.
- Why are my cuttings wilting?
- Wilting in cuttings can be a sign of underwatering, insufficient light, or stress from being too close to a heat source. Ensure they are kept in suitable conditions with proper moisture and light levels to encourage healthy growth.
- How long does it take for cuttings to root?
- The time it takes for cuttings to root varies by plant species and environmental conditions. Generally, softwood cuttings may take anywhere from a few days to a few weeks, while hardwood cuttings can take several weeks to months.
- What should I do if my seedlings are leggy?
- Leggy seedlings often indicate that they’re not receiving enough light. Move them to a brighter location or use grow lights to provide the necessary light intensity. Thinning crowded seedlings can also help them receive more light and space for growth.
- Can I propagate all types of plants?
- Not all plants can be propagated using the same methods. Some plants are easily propagated through cuttings, while others may require stratification or other specific techniques. Always research the best method for each plant species.
Tips for Successful Nursery Growth
As you venture into the world of nursery growth, it’s pivotal to adopt practical strategies that bolster your success in nurturing your propagated plants. Here’s a collection of tips that will enhance your gardening journey and pave the way for a lush, thriving nursery.
First and foremost, keep an eye on environmental conditions. Temperature plays a crucial role in plant health, and most propagated plants prefer a warm, stable environment. Ideally, the temperature should range between 65-75°F (18-24°C). Consider using a thermometer in your propagation area to monitor the conditions accurately.
Next, knowledge about compatible plants is essential. Just as companions in life, plants can benefit from being near certain species while others may compete for resources. Researching companion planting can help you strategically position your propagated plants, enhancing growth and reducing pest pressure. For instance, basil is an excellent companion to tomatoes, helping to ward off harmful aphids.
Don’t overlook the importance of maintaining air circulation. Good airflow can help prevent diseases and mold that thrive in humid conditions. If you notice stagnant air, consider using a small fan near your propagated plants or simply open windows to allow fresh air to circulate. Additionally, adequate spacing between plants can ensure that each has enough room to grow without smothering its neighbors.
Regularly inspect your plants for pests and diseases. Early detection is crucial for maintaining a healthy nursery. Consider integrating beneficial insects such as ladybugs and lacewings, which help manage pest populations naturally without the need for chemical interventions. Creating a biodiversity-friendly environment can further bolster your plants’ health.
Routine maintenance is also vital for your nursery techniques. Schedule time at least once a week to inspect, prune, and sometimes repot your plants as they grow. Pruning helps promote bushier growth and prevents overcrowding, allowing light and air to reach all leaves. Use clean, sterilized tools to minimize the risk of spreading diseases.
Consider utilizing fertilization strategically. As your cuttings or seedlings establish, begin introducing a diluted liquid fertilizer to provide them with essential nutrients. Look for fertilizers rich in nitrogen for leafy growth, and switch to those higher in phosphorus when promoting root development. Always follow the recommended application guidelines to avoid over-fertilizing, which can harm your plants.
Participating in local gardening communities or online forums can provide invaluable tips and support. Engaging with fellow garden enthusiasts allows you to share experiences, troubleshoot challenges, and gain insights that can enhance your propagation efforts. Websites like GardenWeb and communities on platforms such as Reddit can be fantastic resources.
Remember that patience is vital in gardening. The journey from propagation to robust plants takes time, and every setback can serve as a valuable lesson. Celebrate small successes, and don’t be disheartened by failures. As your nursery evolves, you’ll refine your skills and become more attuned to the needs of your plants, ultimately leading to a lush, productive gardening experience.